6 Steps to Create Slides Automatically with a Free AI Tool - Super Easy, Super Fast
Updated
May 8, 2025
Are you tired of spending hours designing slides and still not getting the results you want? Do your presentations look boring and lack impact? Does adjusting images, colors, and layouts drain all your energy? So, how can you create beautiful presentations quickly, without wasting hours on manual edits? Don't worry, the solution is here! In this blog post, I'll share 6 simple steps to create slides automatically using the free AI presentation maker - uPresenter. It's incredibly easy, and anyone can do it. In just a few minutes, you'll have a set of impressive slides ready to go.

As you may already know, uPresenter is a powerful AI platform that helps you build and deploy eLearning content efficiently and rapidly. After a successful Beta trial period with lots of positive user feedback, uPresenter has officially launched with many new features and significant improvements.
Now, let's dive into the 6 steps of creating slides automatically with uPresenter!
Step 1: Sign Up/Log In
To start creating lecture slides with AI, you need to visit the website upresenter.ai. If you're new to uPresenter, sign up for an account by entering your email, name, and password. If you already have an account, simply select Login on the homepage and log in with your email.
Step 2: Create an Outline
Once you're logged in, you'll see the uPresenter workspace. To create a lesson, click on the Create with AI button. Then, enter the title of the content you want to create slides for. For example: "The beauty of Japanese Cherry Blossom".
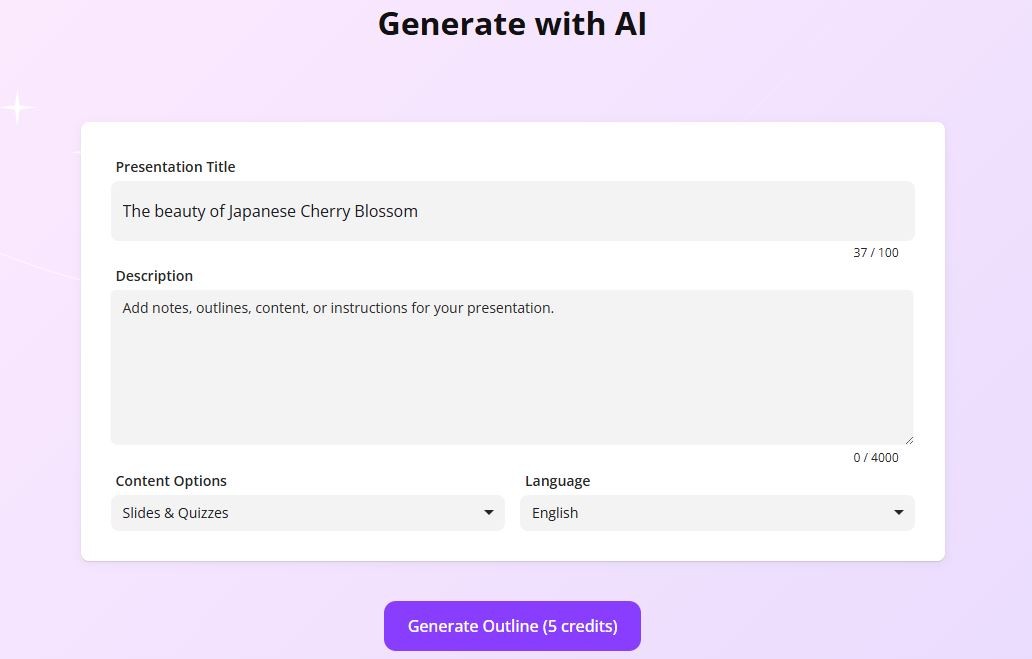
You can either generate an outline right away or add some notes and options to tailor the content to your specific needs. To create slides that include interactive questions, select Slides & Quizzes. uPresenter allows you to request the lesson in a different language if you prefer. After you're done, click the Generate Outline button. uPresenter will automatically generate a slide outline for you.
Step 3: Choose a Template/Theme
Next, select a template or theme for your lesson from uPresenter's extensive template library. Scroll down to explore the various templates and choose the one you like best. uPresenter also provides a slide preview, so you can see the layout beforehand. Once you've made your selection, click the Generate button. In just a few seconds, uPresenter will automatically create a complete lesson based on your outline and chosen template.
Step 4: Edit the Lesson
To make your lesson more lively and engaging, you can edit elements such as information, images, effects, and add interactive questions. uPresenter integrates several advanced AI models, enabling you to create images effortlessly.
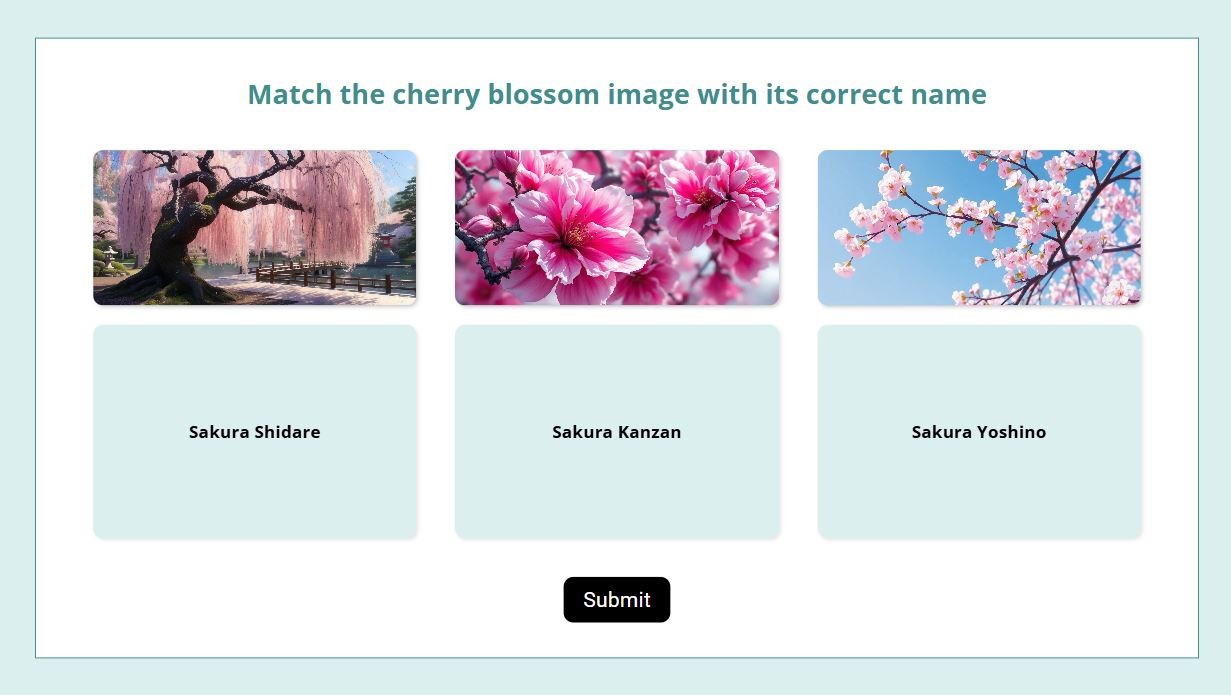
Furthermore, you can also add interactive questions from the pre-built question library. For example, you can create a "Matching" question to pair images of flowers with their names. Creating question slides becomes quick and easy.
Instead of spending hours creating each slide from scratch, you can now focus on editing and transforming your lecture slides to make them more impressive. You can also set up learner evaluation conditions based on scores or the number of slides viewed.
Step 5: Present, Publish, and Share
Once you've finished editing your lesson, you can preview it by clicking the Present button in the top right corner of the screen. If you're satisfied with the lesson, you can publish and share it with others or your students.
To publish, click the "lock" icon in the top right corner and toggle the Publish this presentation for public viewing button to allow public viewing. You can also customize settings such as allowing anyone with the link to view the lesson or requiring viewers to log in. Additionally, you can choose to display your lesson in the Inspiration page or allow others to reuse it.
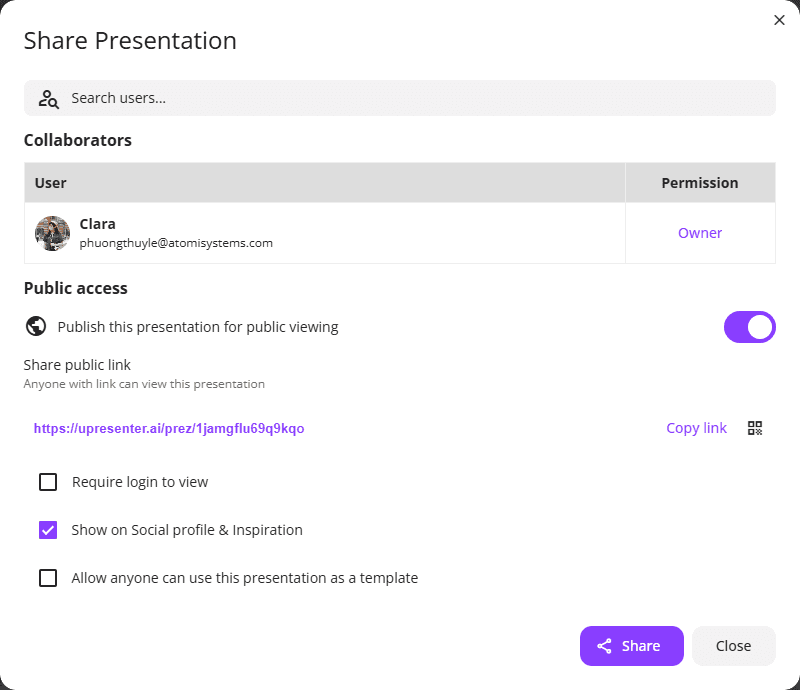
After configuring the settings, click the Share button to publish the lesson publicly. You can copy and send the link or QR code to share the lesson with others. Besides, you can also download the lesson as a PDF document or an xAPI package if you need to package the lesson and upload it to an LMS.
Step 6: Track Engagement
uPresenter allows you to track various data points regarding viewer or student engagement after you share your slides. You can view analytics by clicking the Report icon in the top right toolbar.
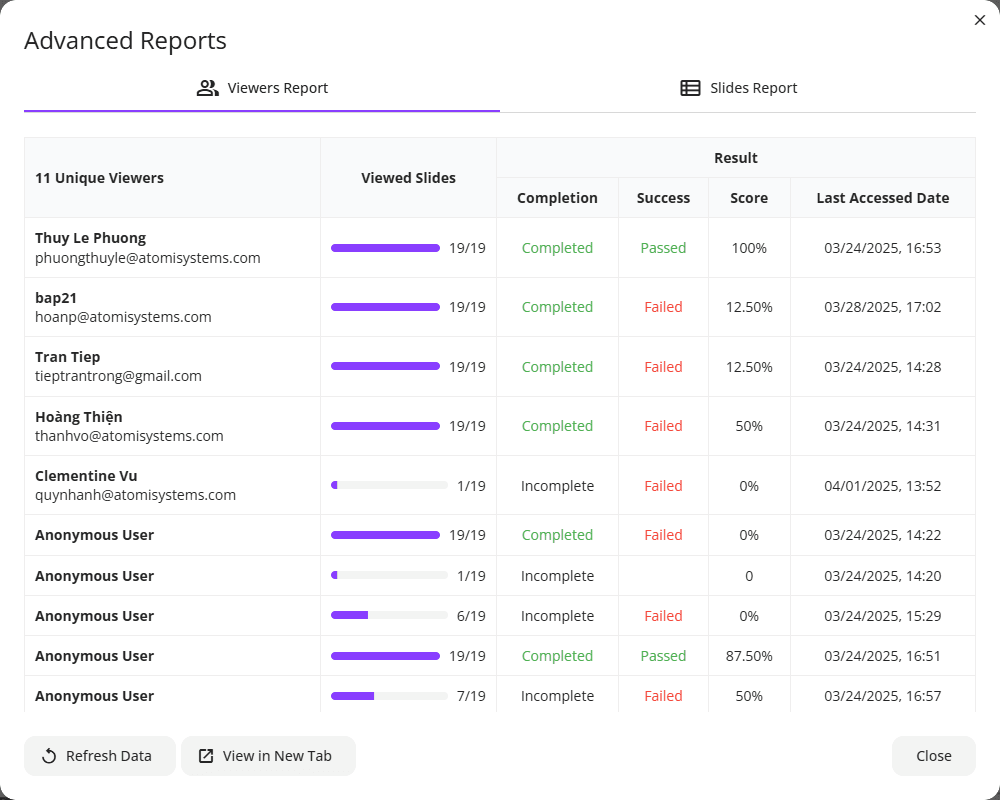
The Vewers Report section provides information such as who viewed the lesson, how many slides they viewed, completion status, pass/fail results, scores, and the last access time. You can also view detailed reports for individual viewers by clicking on their names. uPresenter also generates reports by slide, including detailed information such as the percentage of people who viewed each slide, a list of those individuals, and their answers to interactive questions.
Why is uPresenter the Top Choice for Creating Lecture Slides Automatically?
Advanced AI Technology: Automatically generates questions, images, and content suggestions, helping teachers save time during lesson preparation.
Simple Design: The intuitive interface allows for the creation of professional lecture slides and learning games without requiring technical knowledge or programming skills.
Rich Multimedia Experience: Easily integrates text, images, icons, videos, and AI voiceovers to create engaging lessons.
Diverse Question Formats: Offers 11 question types, from true/false to matching, sliders, dropdown selections, image hotspots, and labeling, catering to all knowledge assessment needs.
Instant Feedback: Learners receive immediate results, reinforcing knowledge and maintaining learning motivation.
Flexible Sharing: Simple publishing and sharing via links or QR codes, reaching all types of learners.
In-depth Analytics: Tracks detailed completion rates, accuracy, and engagement levels to adjust teaching methods.
uPresenter - AI-powered presentation maker is an indispensable tool for every educator, making learning more visual, engaging, and effective than ever before!
Final Words
Hopefully, this detailed guide on the 6 steps to create slides automatically with uPresenter will help you create impressive presentations that are perfect for your work. Visit our YouTube channel for more updated information. Have a nice day!


