
17.1: Create And Organize Classes
Classes bring lesson delivery, enrolled learners, and progress reporting into one place. In this section, you will create a class, recognize the class views, update its appearance, and manage its lifecycle.
Before You Begin
Open Classes from the main navigation. If the view switch shows Student View, switch to Teacher View so the class-management controls are available.
1. Understand The Classes Page
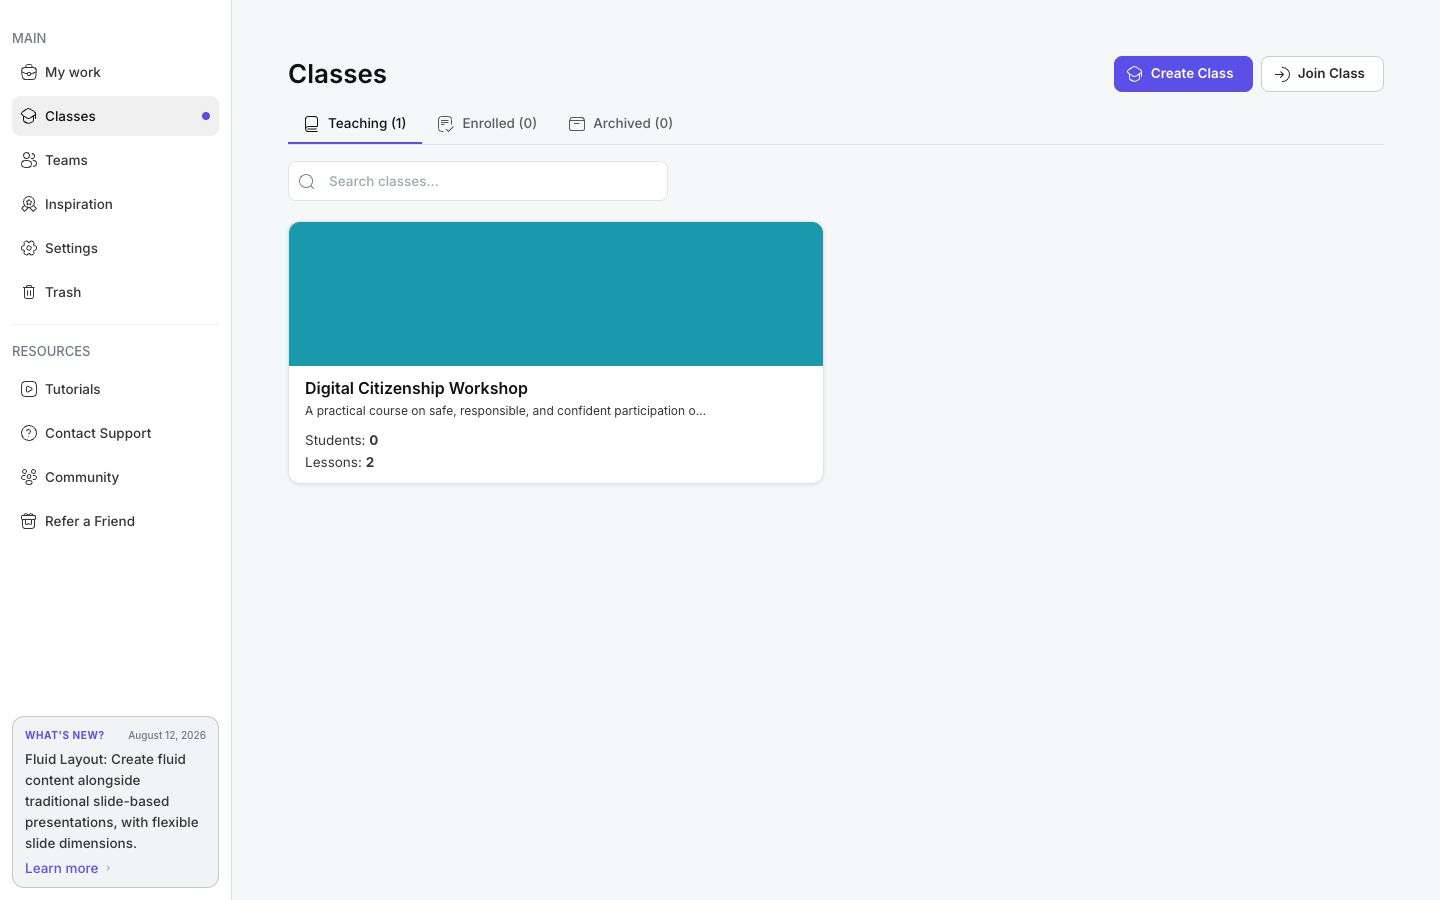
The tabs separate classes by your relationship to them:
| Tab | What it contains |
|---|---|
| Teaching | Active classes that you own and manage. |
Each tab shows the number of classes it contains, such as Teaching (7). | Enrolled | Classes you joined as a learner. | | Archived | Classes you own but have taken out of active use. |
Search applies to the current tab. When a tab contains more than 12 classes, use the pagination controls below the class cards to move between pages.
2. Create A Class
- Select Create Class.
- Enter a Class Name. A name is required and can contain up to 100 characters.
- Add an optional Description of up to 200 characters. A short purpose, audience, or schedule makes the class easier to recognize later.
- Under Background, select Upload if you want a JPG, JPEG, PNG, GIF, or another supported image as the class thumbnail.
- Choose a Theme Color. The current choices are Blue, Green, Pink, Orange, Teal, Purple, Sky blue, and Gray.
- Select Create.
The class opens in Teacher View. It is ready for learners and lessons, but neither is added automatically.
3. Update Class Details
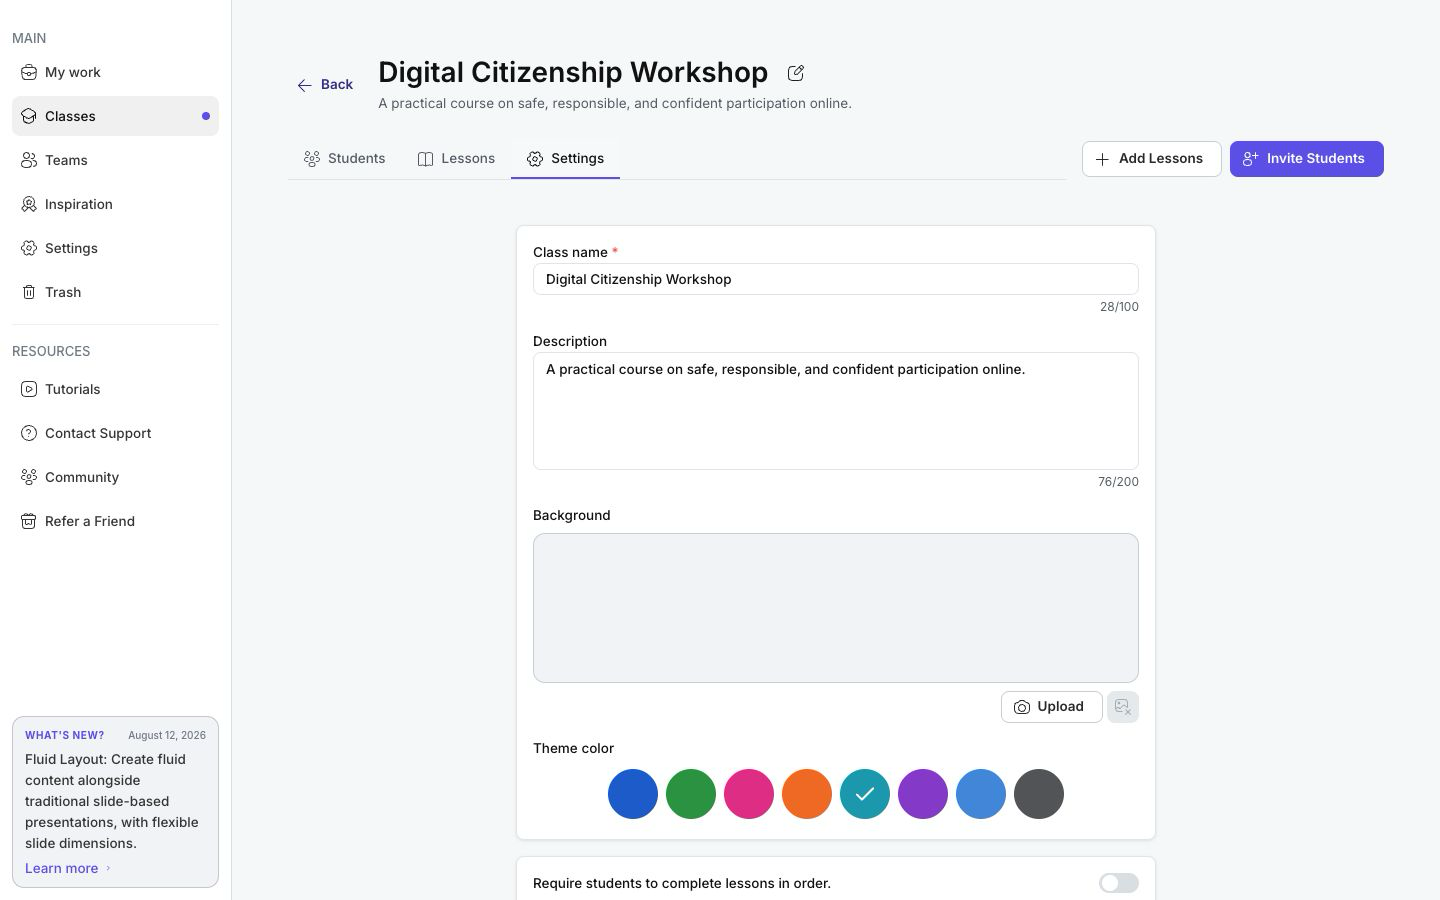
- Open the class from Teaching.
- Select the Settings tab, or use the pencil control (Edit Class) beside the class name.
- Update the name, description, background, or theme color.
- Select Save.
The same page also contains joining and lesson-order settings. Sections 17.2 and 17.3 explain those controls.
4. Archive, Restore, Or Delete A Class
Use the action icons on a class card to manage its lifecycle:
- Select Archive when a finished or temporarily inactive class should leave Teaching. Teachers and students cannot access its lessons until it is restored.
- Open Archived and select Restore to return the class to active use.
- Select Delete when the class is no longer needed, then confirm the warning. Deletion is permanent and removes access to the class's student list and outcomes.
Archiving is the safer choice when you may need the class or its learning record again. Deleting a class does not belong in routine end-of-term cleanup unless the record is no longer required.
Troubleshooting
| What happens | What to do |
|---|---|
| Create Class is not visible | Switch from Student View to Teacher View. |
| A class is missing from Teaching | Clear the search, then check Archived. |
| A background image does not upload | Try a supported image file and confirm that the browser can read it. |
| Learners cannot open an archived class | Restore it from Archived before asking them to try again. |
| You are unsure whether to delete | Archive the class. Deletion is permanent, while an archived class can be restored. |
Previous: Part XVI — Reports And Analytics · Next: Enroll And Support Learners · Back to Part XVII · Back to the full guide