
4.2: Navigate And Make Basic Edits
This section covers the actions you will use repeatedly in the editor: selecting an object, moving or resizing it, renaming the presentation, reversing changes, and adjusting the canvas view.
Use a practice presentation while learning. Changes are saved automatically, so verify the save-status icon before leaving the editor.
1. Select A Slide Or Object
- In Slides, select the page you want to edit.
- Select an object once on the canvas. A selection border or handles appear, and the floating toolbar changes.
- Select Properties in the vertical toolbox when you need detailed controls.
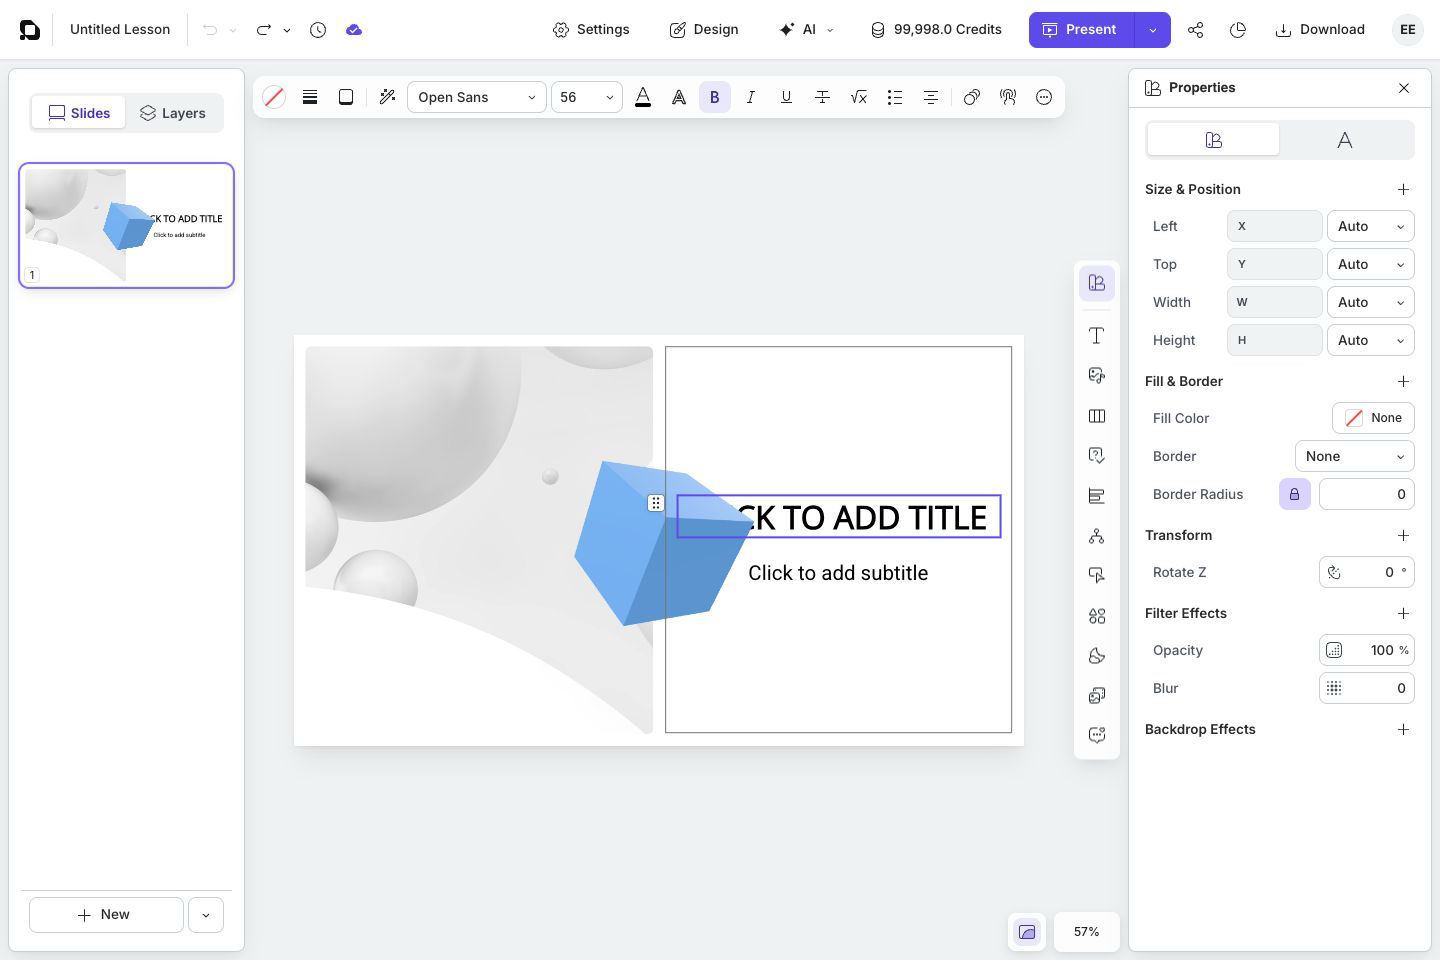
Select empty slide space to return to slide-level controls. If overlapping objects make selection difficult, open Layers and select the object there.
2. Move And Resize An Object
Drag the selected object to move it. Drag a handle on its selection border to resize it.
For precise layout, open Properties and expand Size & Position. Depending on the object and layout, you can edit Left, Top, Width, and Height, or leave a dimension set to Auto. Automatic layout objects can behave differently from freely positioned slide objects, so check the result on the canvas after changing a value.
Keep objects inside the intended slide area unless an off-slide position is deliberate. Off-slide objects can affect the authoring view even though learners should not see them in the normal trimmed presentation.
3. Rename The Presentation
- Select the presentation title in the top bar.
- Edit the Document name field. The name can contain up to 100 characters.
- Press Enter or select elsewhere to save the new name.
Press Escape if you opened the field but do not want to save the edit. Use a name that will still be clear in the library, class assignments, shared links, and reports.
4. Undo Or Redo One Action
Select Undo in the top bar to reverse the most recent reversible editor action. Select Redo to reapply an action you just undid.
The buttons are unavailable when their corresponding history is empty. If you undo an action and then make a different edit, the old redo path can be cleared.
5. Move Through Several History Steps
Open the small arrow beside Undo or Redo to see the available history. Move over the actions to highlight a range, then select an action to undo or redo through that point.
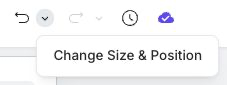
History labels describe the recorded operation, such as Change Size & Position. After a multi-step change, inspect the affected slide, question behavior, and interactions rather than assuming every related result is correct.
Undo history is not the same as Version History. Use the top-bar clock for older saved versions and collaborative recovery; version history is covered later in the guide.
6. Change The Zoom
Select the percentage beside the bottom-right canvas controls. The current menu offers presets from 10% through 300%, plus Fit to screen.
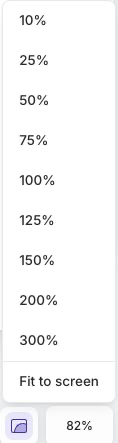
- Use a higher percentage for detailed alignment or small text.
- Use a lower percentage to inspect the whole composition and surrounding workspace.
- Select Fit to screen after opening or closing a pane so the current slide fits the remaining canvas area.
Zoom changes only the editor view. It does not change the presentation's slide size or the learner's display scale.
7. Toggle Trim View
The Trim view button sits beside the zoom percentage. When it is on, off-slide content is clipped to the intended slide area. Turn it off when you need to find or reposition an object that extends beyond the slide.
You can also open the account menu in the top-right corner and select Trim view. A check indicates that it is on.
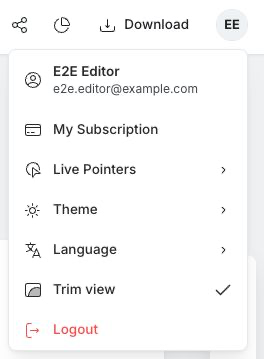
Turn Trim view back on before your final visual review. Then select Present to verify what a learner will actually see.
Quick Check
Before continuing, make sure that you can:
- select a slide, object, or layer;
- move and resize a practice object;
- rename the presentation and cancel a rename;
- use single-step and multi-step undo or redo;
- choose a zoom preset and Fit to screen; and
- use Trim view to inspect off-slide content without confusing it with the learner view.
Previous: Understand The Editor Screen · Next: Work Faster With Keyboard Shortcuts · Back to Part IV · Back to the full guide