
7.3: Insert Images, Audio, And Video
Media helps learners see an example, hear an explanation, or watch a process instead of relying on text alone. Use it deliberately: every image, sound, or video should support a learning purpose and should still leave the slide easy to read.
In this section, you will add uploaded and AI-generated images, upload audio and video, embed a video from a supported provider, and adjust the media for the learner experience.
Before You Begin
Open the presentation you want to edit and select the destination slide. Prepare only files you are allowed to use, and add captions, transcripts, or equivalent explanations when learners need an accessible alternative.
The direct Media upload commands use the same formats and limits as the presentation's resource library:
| Media type | Supported formats | Maximum size |
|---|---|---|
| Image | JPG, JPEG, PNG, GIF, SVG, AVIF, WEBP, BMP | 5 MB |
| Audio | AAC, MP3, WAV, OGG, FLAC, OPUS, M4A | 30 MB |
| Video | MP4, WEBM | 50 MB |
1. Open The Media Menu
Select Media on the right side of the editor. The current menu is divided into four groups:
- Images: Image and AI Image;
- Audio: Audio, Text to Speech, and Record Audio;
- Video & Embeds: Video, YouTube, Vimeo, and Dailymotion; and
- 3D Model: 3D Model.
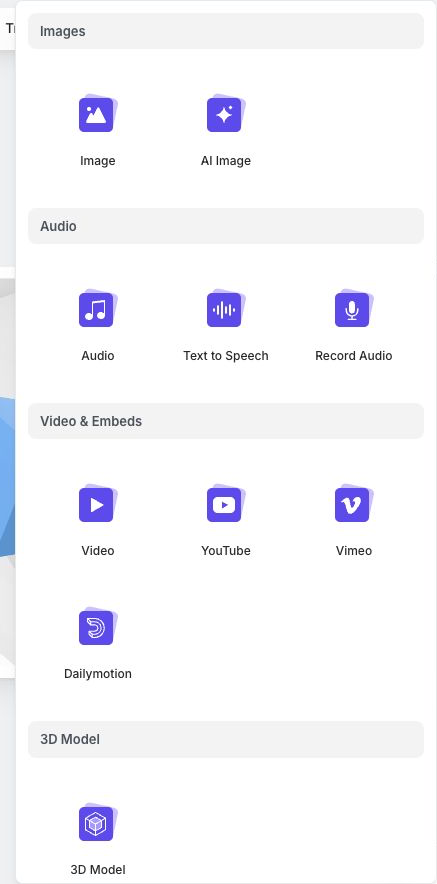
Use Section 7.1 for the complete 3D-model workflow. The current Media menu does not have separate Icon or Graphic commands; use Icons as described in Section 6.3, or insert artwork as an image.
2. Upload An Image
- Open Media and select Image.
- Choose a supported image file from your device.
- Wait for the upload to finish. uPresenter adds the file to Resources and inserts an image object on the current slide.
- Drag the image into place and resize it with the selection handles.
- Open Properties. Under Image / Video, choose an Object Fit value and Object Position when the source does not sit correctly inside its frame.
Use Contain when the complete source must remain visible, or Cover when filling the frame is more important and some cropping is acceptable. Check small text inside an image at the learner's likely screen size; if it is hard to read, recreate it as slide text or provide a larger view.
To replace the source without rebuilding the layout, select the image, open Change Image in the floating toolbar, and either upload another file or choose Resources.
3. Generate An Image With AI
Open Media and select AI Image. The Generate image dialog lets you:
- describe the subject and important visual details under Prompt;
- use Enhance prompt to expand a short description;
- choose a Style from the illustrated list (Auto, Isometric, Low Poly, Claymation, Origami, Line Art, Pixel Art, Texture, Custom, and others);
- choose an Aspect Ratio; and
- choose a Model.
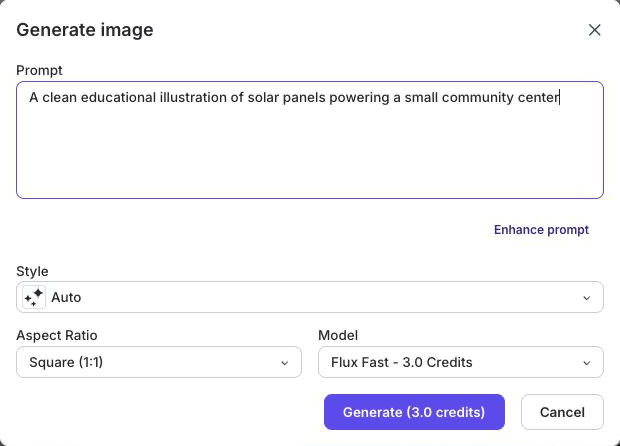
The Generate button shows the current credit cost for the chosen model. Image-model availability and pricing can change, so read that button before submitting instead of relying on an older credit estimate.
Select Generate only when the prompt, ratio, model, and displayed cost are correct. The generated result is inserted as an image. Review it for factual accuracy, unwanted text, stereotypes, and visual errors before teaching with it. If the result is not suitable, revise the prompt or use a verified uploaded image.
4. Upload And Configure Audio
Open Media, select Audio, and choose a supported file. After upload, the audio object appears on the current slide and the source is available under Resources > Audio.
Select the audio object to configure it:
- Display Audio in the floating toolbar switches between Default and Simple display modes.
- Change Audio uploads a replacement or chooses one from Resources.
- Text to Speech regenerates the selected audio from text.
- Download Audio saves the current source file.
- Properties > Playback provides Mode, Controls, Autoplay, and Loop.
New audio is inserted with controls and autoplay enabled. Browsers can restrict autoplay, especially when the learner has not interacted with the page, so test the real delivery environment. For most lessons, learner-controlled playback is less surprising than audio that starts automatically.
Use Section 7.4 when the narration should be generated from text or recorded in the browser.
5. Upload And Configure Video
Open Media, select Video, and choose an MP4 or WEBM file no larger than 50 MB. Once it is inserted, select the video and open Properties.
- Image / Video provides Object Fit and Object Position.
- Playback provides Controls, Autoplay, and Loop.
- Change Video in the floating toolbar uploads a replacement or chooses one from Resources.
Keep the important action inside the visible crop. Use Present to check playback, sound, captions included in the source, and any slide controls near the video. A long video is often easier to learn from when it is divided into shorter clips with a question or summary between them.
6. Embed A Hosted Video
Use an embed when the video already has a public or learner-accessible page on YouTube, Vimeo, or Dailymotion.
- Open Media.
- Select the provider.
- Paste the video's URL into Video URL.
- Select Insert.
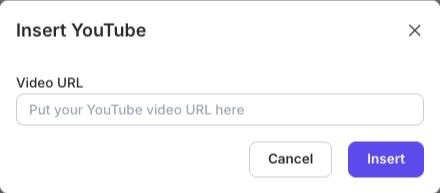
If the address is not recognized, uPresenter reports an invalid provider URL. Copy the normal public video page address instead of an unrelated channel, search, or account URL.
An embedded video depends on the learner's network and the provider's availability, privacy setting, region rules, sign-in requirements, and embedding policy. It is not copied into the presentation's resource library. Confirm that the intended learners can open it, and provide a transcript or alternative resource when access may vary.
To update an embed, select it and use Change YouTube URL, Change Vimeo URL, or Change Dailymotion URL in the floating toolbar. Test the updated source in Present mode.
7. Reuse Media Instead Of Uploading Duplicates
When a file is already in the presentation, open Resources, choose Images, Videos, or Audio, and select the existing item. Reuse is faster and avoids storing unnecessary copies. See Section 7.2 for search, replacement, download, multi-selection, and safe deletion.
If Media Does Not Work As Expected
| What you see | What to do |
|---|---|
| The file chooser rejects the file | Convert it to a supported format; changing only the filename extension does not convert the media. |
| File size exceeded | Compress the image, shorten or re-encode the audio/video, and try again within the listed limit. |
| The image or video is cropped badly | Change Object Fit and Object Position, then check the result in Present. |
| Audio or video does not autoplay | Enable Controls so the learner can start it; the browser may block automatic playback. |
| An embed URL is invalid | Paste a supported provider's normal video-page URL. |
| An embed works for you but not a learner | Check provider privacy, region, age, sign-in, and embedding restrictions, then offer an accessible alternative. |
| AI image generation is unavailable | Check credits, the selected model, and the network connection; use an uploaded image if generation remains unavailable. |
Quick Check
Before continuing, make sure that:
- uploaded files meet the current format and size requirements;
- image and video crops keep the important content visible;
- learners can control playback when autoplay is blocked or inappropriate;
- every hosted video is accessible to the intended audience;
- AI-generated images have been reviewed for accuracy and suitability; and
- frequently reused files come from Resources instead of duplicate uploads.
Previous: Upload, Reuse, And Manage Resources · Next: Create Speech And Record Audio · Back to Part VII · Back to the full guide