
3.3: Use AI Tools In The Editor
AI-assisted editing helps after a presentation already exists. The built-in AI Agent can inspect and change the current presentation through chat, while contextual AI commands work on selected text or images. Connect AI lets advanced users attach a trusted external AI app to the current presentation.
These tools can modify real lesson content. Work in a practice copy when you are experimenting, describe the requested change precisely, and review the result before moving on.
1. Choose Built-In Or External AI
Open a presentation, then select AI in the editor top bar.
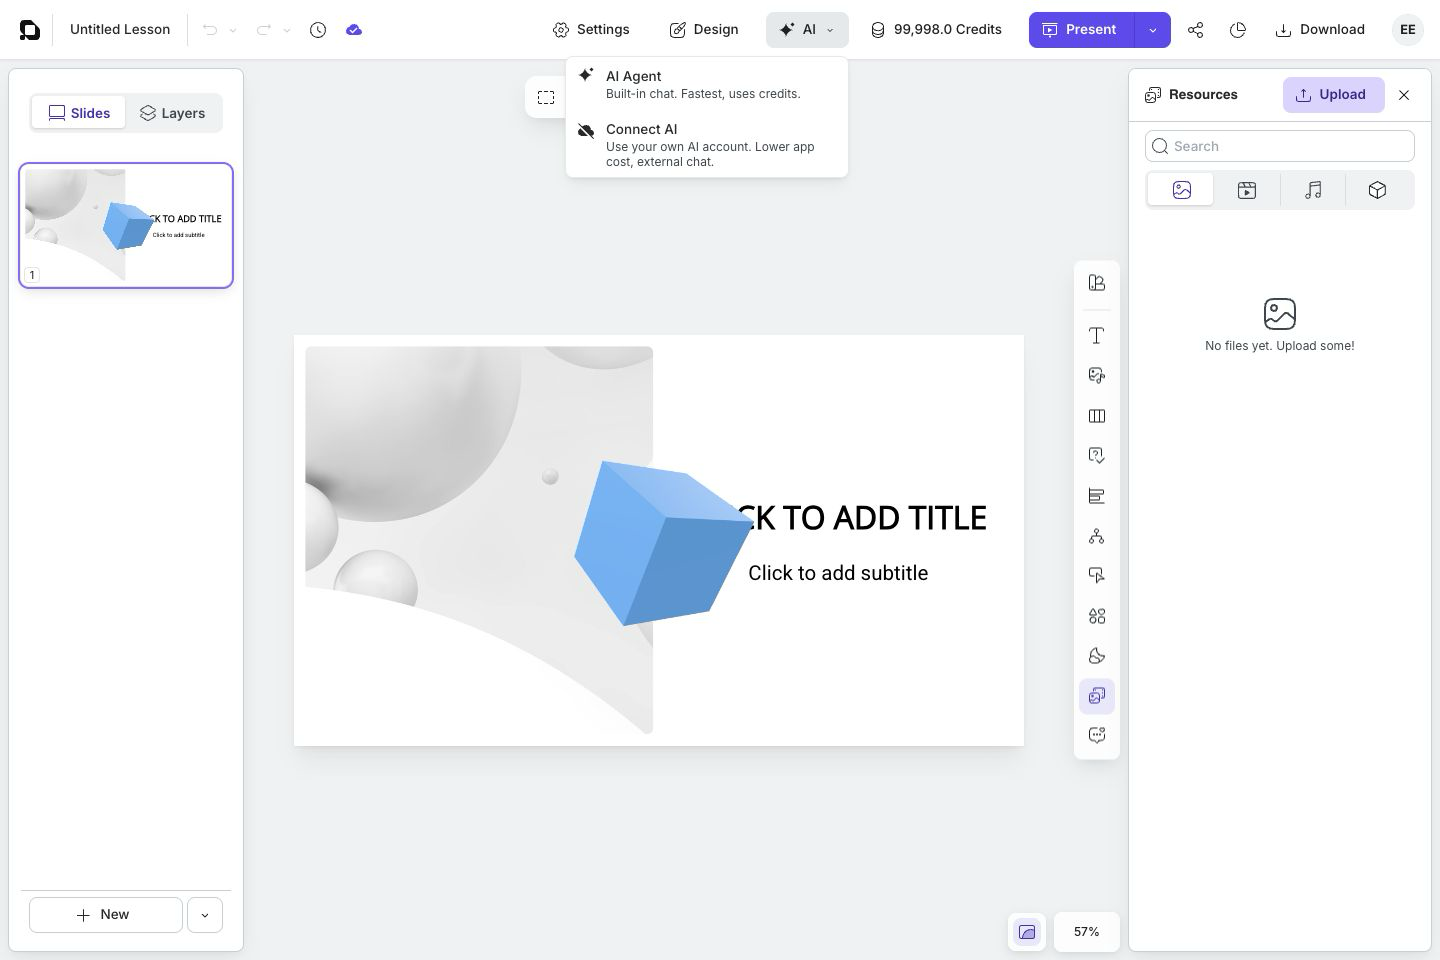
The menu explains the two paths:
- AI Agent is the built-in chat and uses uPresenter credits.
- Connect AI uses your own supported AI account for an external chat and can reduce built-in chat credit usage.
If the presentation uses a legacy template, uPresenter warns that AI design changes may not produce good results. Select Cancel when appearance must remain exact, or Continue when you understand that risk.
2. Ask AI Agent To Edit The Presentation
Select AI Agent. A drawer opens beside the canvas.
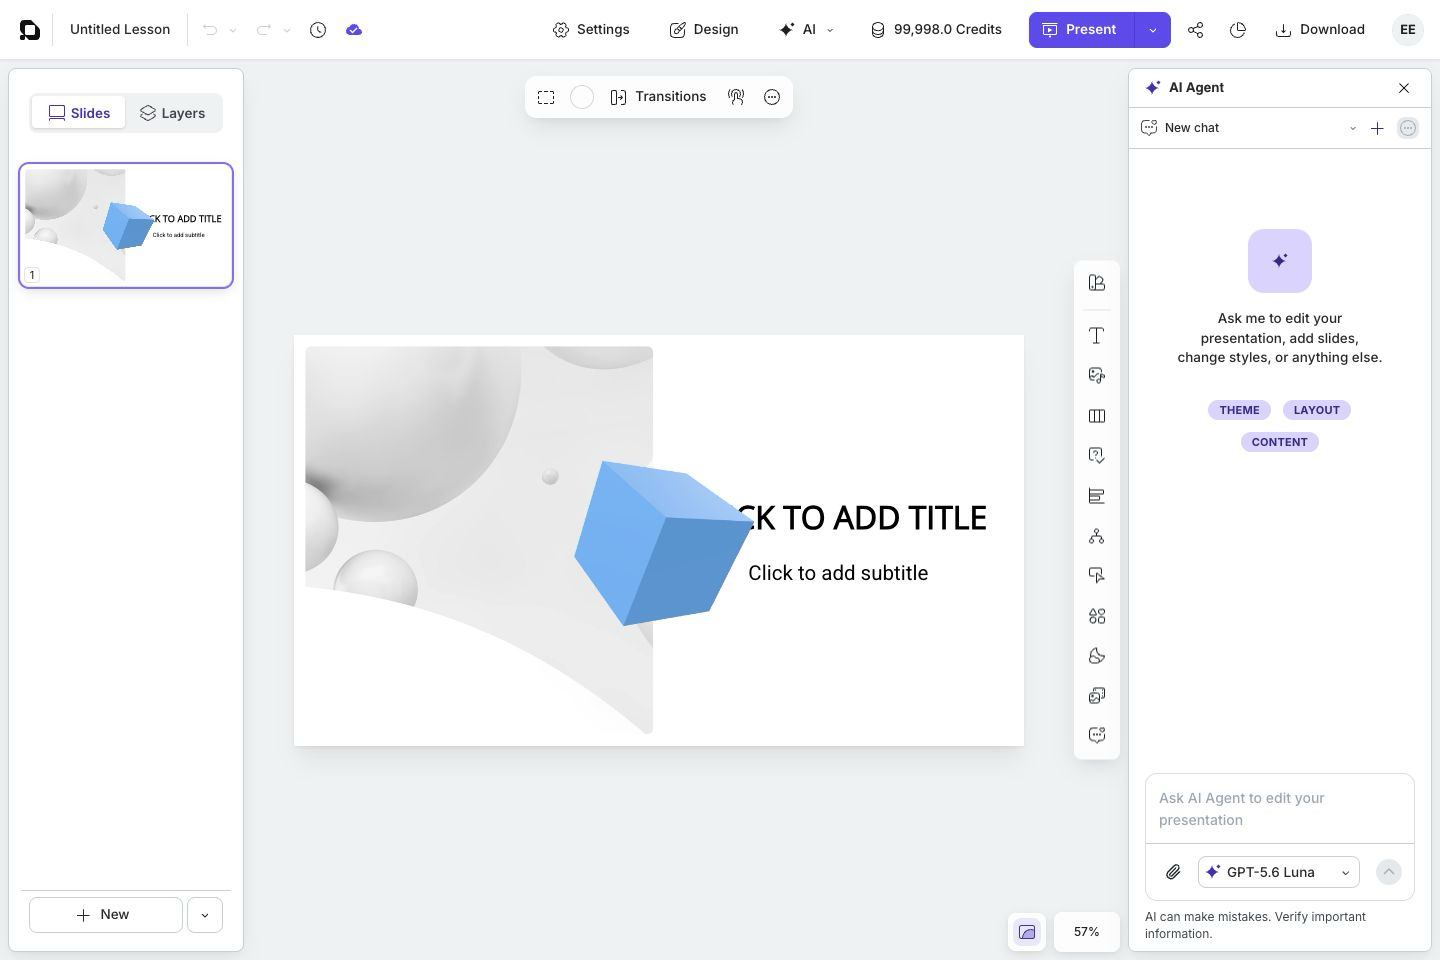
- Select a language model from the control beside the prompt. Lower-tier models can reduce reasoning quality and slide-edit reliability.
- Enter a specific request in Ask AI Agent to edit your presentation. State which slides or objects should change and what must stay unchanged.
- Optionally select Theme, Layout, or Content to reveal starter requests.
- To ground the request in a source, select Attach PDF. AI Agent currently accepts PDF attachments only.
- Select Send.
- Read any question or proposed tool action before answering. If AI needs a decision, provide the smallest clear instruction that lets it continue safely.
- Select Stop if the running operation should not continue.
- Inspect the canvas, slide list, properties, questions, and save status after the operation.
Use Undo when a recent AI change is not useful. For a larger or older change, compare version history or return to a practice copy rather than trying to reverse many edits manually.
Write Requests That Are Easy To Verify
Prefer: “On slides 2–4, shorten each body section to no more than three bullets. Keep all legal wording and do not change the quiz.”
Avoid: “Make it better.” A vague request gives you no clear acceptance check and can affect more of the lesson than intended.
3. Manage Chat Sessions
The session bar starts at New chat.
- Select New chat session when a new task should not inherit the previous discussion.
- Select Select session to return to an earlier chat.
- After a session exists, open Chat actions to choose Rename chat or Delete chat session.
Keep one session focused on one goal, such as rewriting tone, building an assessment, or revising layout. This makes the history easier to understand and reduces conflicting instructions.
4. Use AI On Selected Text
Enter text editing mode and select the text you want to change. Open AI Writing in the selection toolbar, then choose one of the current commands:
- Improve Writing
- Fix Grammar
- Make Shorter
- Make Longer
- Professional Tone
- Casual Tone
- Custom Prompt…
The result applies to the selected text, so check that important terms, numbers, and meaning remain correct. Text to Speech appears in the same menu but creates speech audio rather than rewriting the text.
5. Generate Or Refine An Image
Select an image or an image-filled object to reveal the relevant contextual commands.
- AI Image opens a prompt-based image workflow.
- Enhance prompt asks AI to improve the image description before generation.
- Choose an image style, aspect ratio, and image model; the displayed generation cost reflects the current choice.
- Regenerate Image is available for a generated image that retains its prompt and model information.
- Remove Background removes the background from an image or image fill.
Generated and background-removed images can use credits. Review fine details, embedded text, brand accuracy, and representation before using the result with learners.
6. Connect A Trusted External AI App
Select AI and then Connect AI. The dialog supports Codex, Claude Code, and Gemini CLI.
The easiest path is to select the AI app, choose Copy prompt, and paste that setup prompt into the trusted app. If the app cannot complete setup from the prompt, expand Advanced setup and copy either the client command or the MCP server link into the appropriate terminal or remote-MCP setting.
The connection is scoped to the current presentation and can edit it. Protect it as you would an access token:
- never put the setup prompt, command, MCP link, or token in documentation, screenshots, source control, chat transcripts, or support tickets;
- connect only an AI app and account you trust;
- remove or replace sensitive presentation content before granting access; and
- remember that generating uPresenter-hosted resources such as AI images or media may still use credits.
After connecting, ask the external app to confirm that it can inspect the presentation, then give it one bounded change and verify the result in uPresenter.
Quick Check
Before you finish, make sure that you can:
- choose between AI Agent and Connect AI;
- start, stop, rename, and delete an AI chat session;
- review an AI operation and undo an unsuitable change;
- use contextual AI commands only on the intended text or image; and
- keep MCP connection details private.
Previous: Create A Presentation With AI · Next: Start From A Template · Back to Part III · Back to the full guide