
17.2: Enroll And Support Learners
A learner can enter a class through an email invitation or a joining code. In this section, you will share both kinds of access, control approval, manage pending people, and use Student View to understand what enrolled learners see.
1. Invite Learners By Email
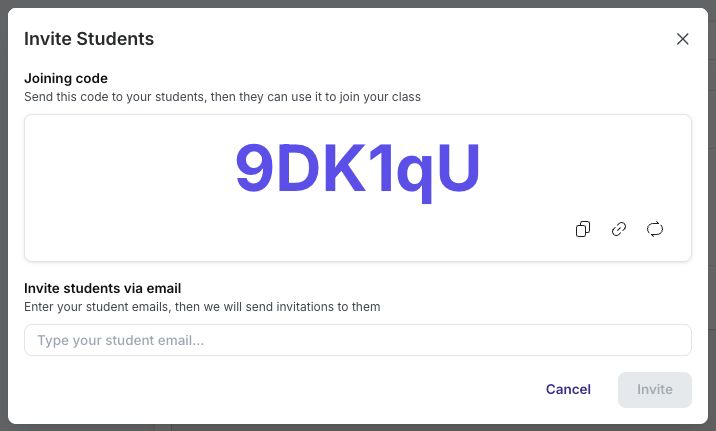
- In Teacher View, open a class and select Invite Students.
- Enter an email address and add it to the invitation list. You can add more than one valid address before sending.
- Review the list and select Invite.
The invitation appears on the class's Students tab until it is accepted or removed. The intended learner should sign in with the invited email address, open the invitation from their activity or notification entry, and accept it. uPresenter then opens the class in Student View.
On the Students tab, use Resend if a pending invitation needs to be sent again, or Remove to cancel it. Expired invitations are marked Expired.
2. Share A Joining Code Or Link
The Invite Students dialog also shows the current joining code and controls for copying the code, copying the invitation link, and resetting the code. You can find the same joining information on the class Settings tab.
To join with a code, the learner:
- Switches to Student View and opens My Classes.
- Selects Join Class. The same control also sits beside Create Class on the Classes page in Teacher View.
- Enters the joining code and submits it.
If Auto approve students is on, a valid code enrolls the learner immediately. If it is off, the learner sees confirmation that the request was sent; the teacher opens Students and uses Approve or Remove on the pending request.
Select Reset beside Joining Code when a shared code should no longer be used. Share the newly generated code afterward. A learner cannot join a class they own as its teacher.
3. Review The Enrolled Class
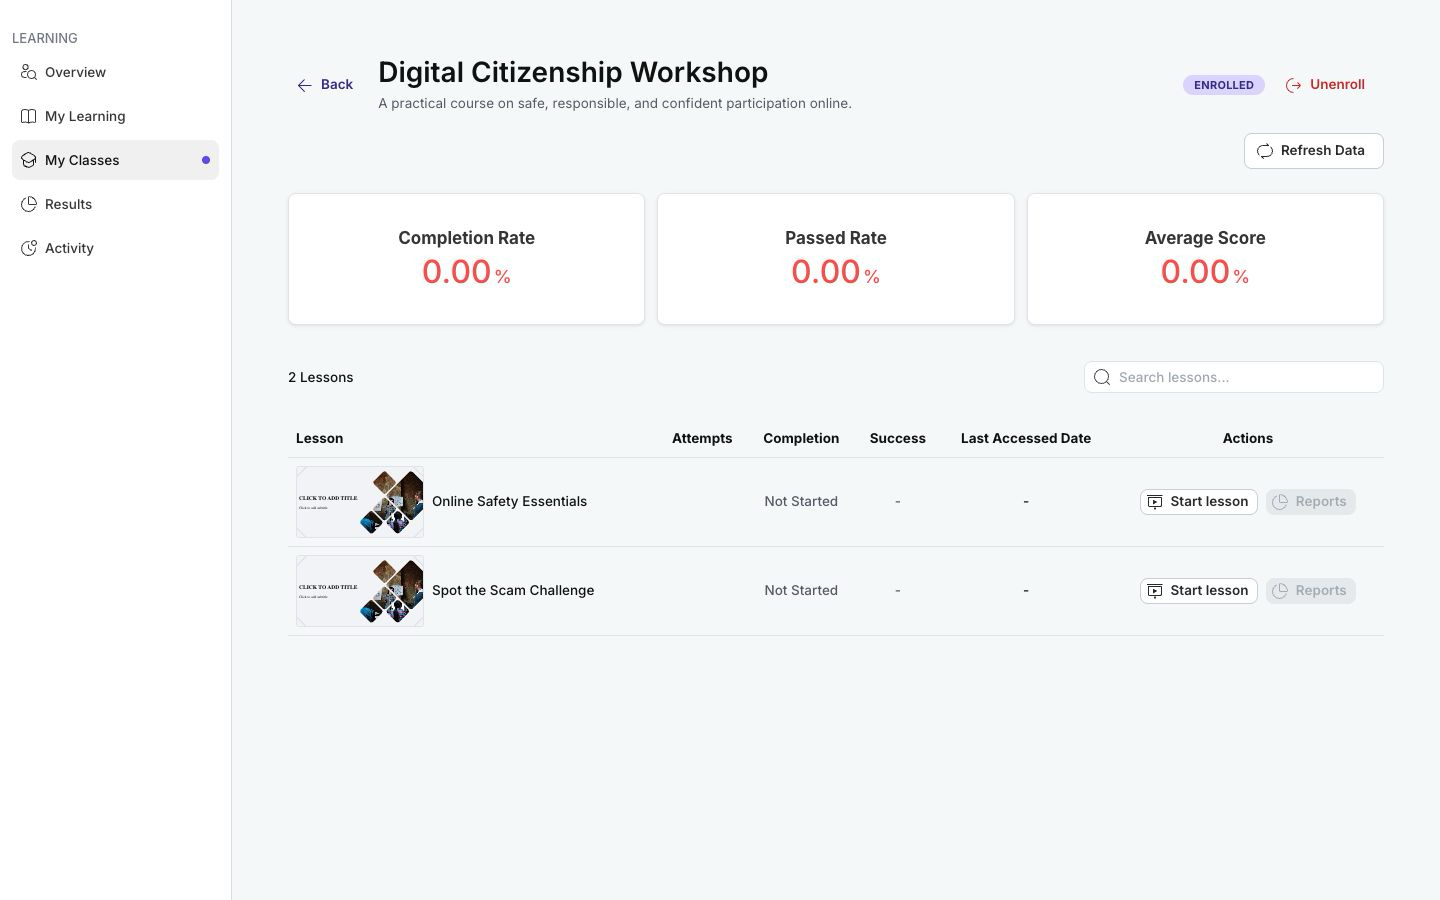
Student View has its own navigation: Overview (a learning overview with class, assigned-lesson, in-progress and completed counts), My Learning, My Classes, Results, and Activity.
In Student View, My Classes shows enrolled classes. Opening one class displays:
- the teacher and enrollment state;
- overall completion, passed rate, and average score;
- every assigned lesson and its current state;
- Start lesson, Resume lesson, or a disabled Attempt limit reached with Reports when no attempt remains;
- a Reports action for the learner's own activity.
Select Unenroll only when the learner should leave the class. Confirming it removes the learner from that class; they would need another invitation, joining code, or approval to return.
4. Find Work In My Learning
Starting or resuming a lesson first opens a confirmation (Start lesson or Continue) stating that the answers and progress will be recorded and shared with the teacher.
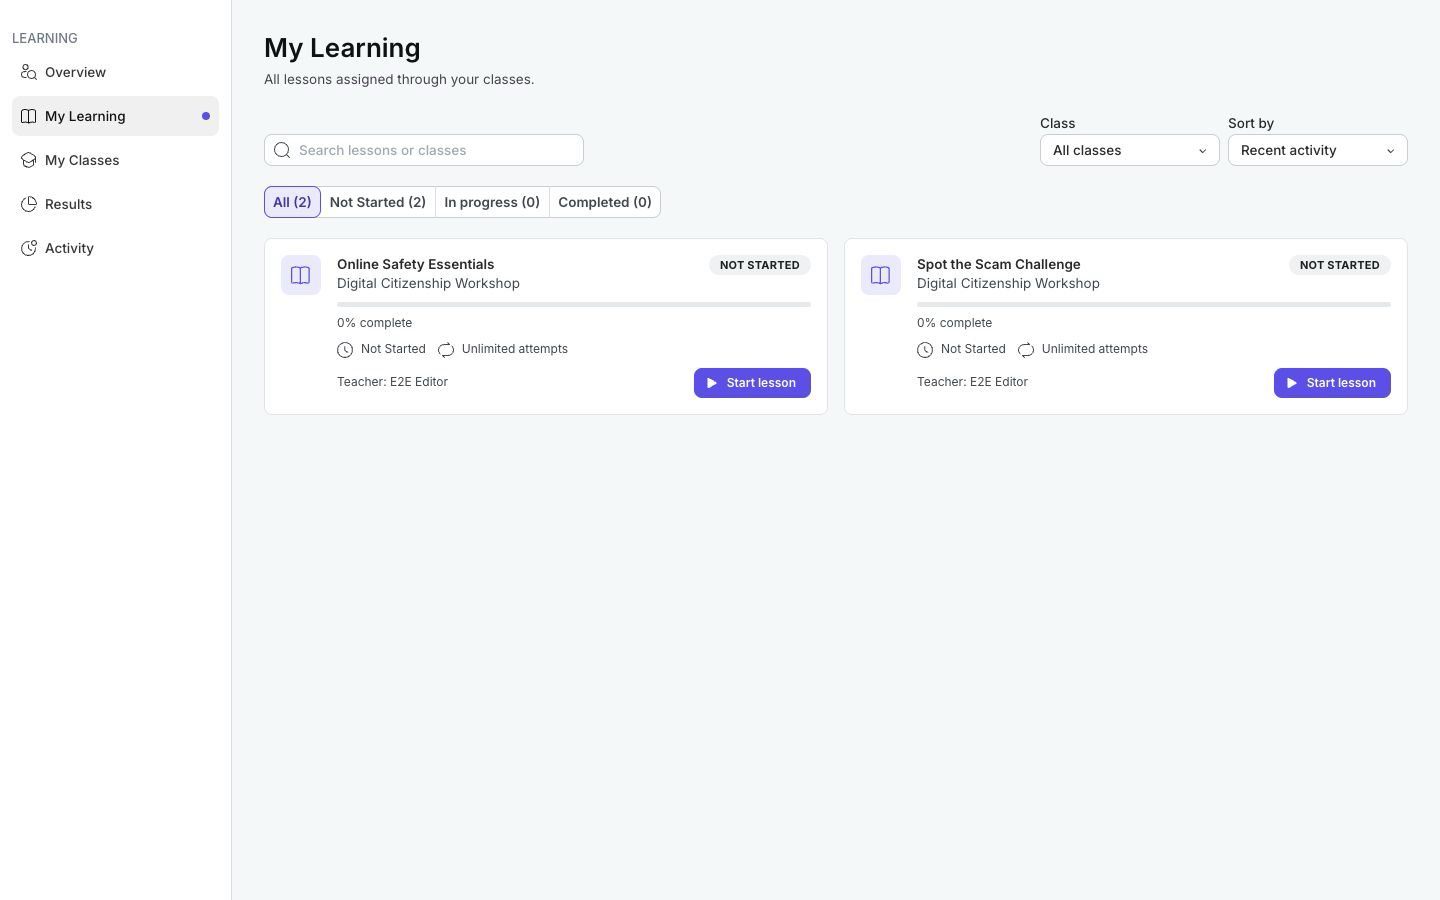
My Learning collects assigned lessons across enrolled classes. Use:
- search to find a lesson by name;
- Class to limit the list to one class;
- All, Not Started, In progress, or Completed to filter by progress;
- Sort by to order lessons by recent activity, name, class, or progress.
Lesson cards can show Not Started, In progress, Completed, Passed, or Failed. Passed and Failed describe the result against the lesson's success criteria; completion only means that the required completion criteria were met.
Troubleshooting
| What happens | What to do |
|---|---|
| An invitation is not visible to the learner | Confirm that they signed in with the invited email, then resend the invitation from Students. |
| A joining code creates a pending request | Auto approve students is off. The teacher must select Approve on the request. |
| A previously shared code fails | The teacher may have reset it. Ask for the current joining code or invitation link. |
| A lesson is missing from My Learning | Clear search and filters, verify the selected Class, and confirm that the lesson is still assigned. |
| A learner sees Completed but not Passed | Completion and success are separate. Review the lesson's completion and success criteria and the learner's score. |
Previous: Create And Organize Classes · Next: Assign And Sequence Lessons · Back to Part XVII · Back to the full guide