
10.4: Add Slide Transitions
A slide transition controls how the presentation moves from one slide to the next. Consistent, restrained transitions can make section changes clear without distracting from the lesson.
In this section, you will apply a transition, choose its duration and direction, update several slides, and remove a transition.
Before You Begin
Open Slides in the left pane and select a thumbnail so no object remains selected. Select Transitions in the slide selection toolbar.
1. Choose A Transition
The Transitions pane groups effects as Basic, Dynamic, and Exciting. Move the pointer over a transition tile to preview it on the canvas. Select a tile to apply it to the selected slide or slides.
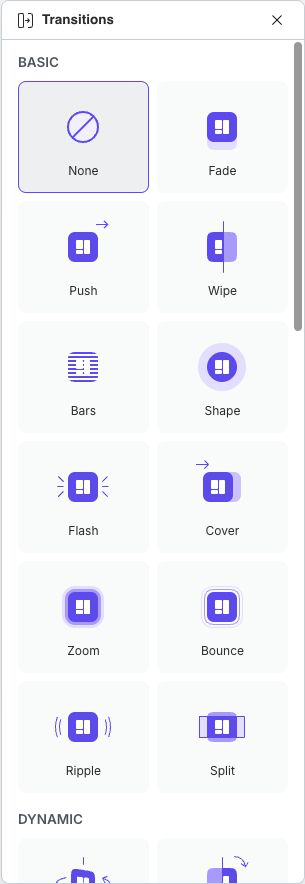
Use Basic effects such as Fade, Push, or Wipe for most instructional content. Reserve stronger movement for meaningful section changes, demonstrations, or a deliberate visual style.
2. Configure Duration And Direction
After selecting a transition, its settings appear below the active tile.
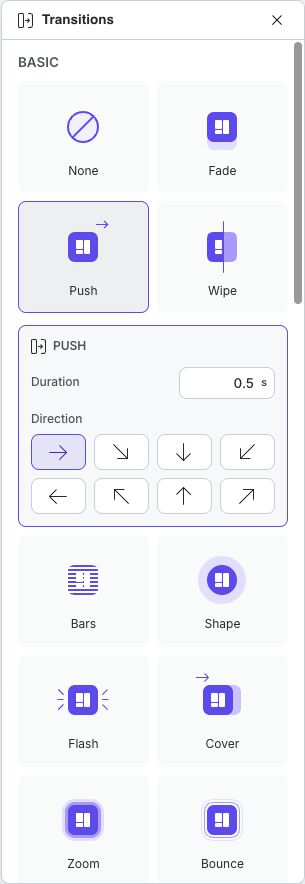
- Duration controls how long the transition plays. The current editor accepts values from 0.1 to 5 seconds.
- Direction appears only for transitions that support it. Move the pointer over a direction button to preview that variation, then select the direction you want.
Keep duration consistent across slides that belong to the same section. A short transition usually keeps a lesson moving; a long transition should signal something meaningful.
3. Apply A Transition To Several Slides
Select the target slides in the Slides pane before choosing the transition:
- Hold Ctrl on Windows or Command on macOS while selecting non-adjacent thumbnails.
- Select the first slide, hold Shift, and select the last slide to select a continuous range.
The chosen transition and its settings apply to the selected slides. If the selection contains different transitions, the pane displays Mixed transitions. Choosing an effect replaces the mixed transition types for the selection.
To use the current transition throughout the presentation, select Apply to all slides after choosing an effect. This applies its current duration and direction to every slide, so review intentional section changes afterward.
4. Remove A Transition
Select the affected slide or slides, then choose None under Basic. The content of each slide remains unchanged; only the movement between slides is removed.
5. Test The Complete Sequence
Select Present and move through the deck at a learner's normal pace. Check that:
- transitions do not delay access to instructions or questions;
- direction remains consistent with the lesson's spatial logic;
- motion does not compete with object animations on the destination slide; and
- section changes feel intentional rather than random.
Quick Check
Before finishing Part X, make sure that you can:
- apply and preview a transition;
- adjust Duration and Direction;
- update a slide range or non-adjacent selection;
- use Apply to all slides deliberately;
- remove transitions with None; and
- test transitions together with object animations and interactions in Present.
Previous: Animate Objects · Next: Use Variables · Back to Part X · Back to the full guide