
3.2: Create A Presentation With AI
Create with AI turns a topic, learning objective, outline, or source document into a first draft. It can create instructional slides, quiz content, or both. You still make the important decisions: what learners need, which source is authoritative, what the outline should contain, and whether the finished lesson is safe to deliver.
You can practise with the short fire-safety notes included with this section.
Before You Begin
Sign in, switch to Teacher View, and confirm that the correct account and workspace are active. AI generation uses credits. The available language and image models, their credit costs, and generation limits can depend on the current plan.
1. Start From A Prompt
From My work, select Create with AI. The page asks what you want to create and offers example prompts for inspiration.
Write a prompt that states:
- the audience and their existing knowledge;
- the learning outcome;
- the topics that must be included;
- the desired length or depth; and
- any required quiz, tone, or constraints.
For example: “Create a concise workplace fire-safety lesson for new employees. Cover evacuation procedures, extinguisher basics, and a short knowledge check.”
The live prompt counter supports up to 50,000 tokens. You can paste notes or an existing outline directly into Prompt, but concise, well-structured source material is easier to review.
2. Review The Generation Settings
Open Settings before generating the outline.
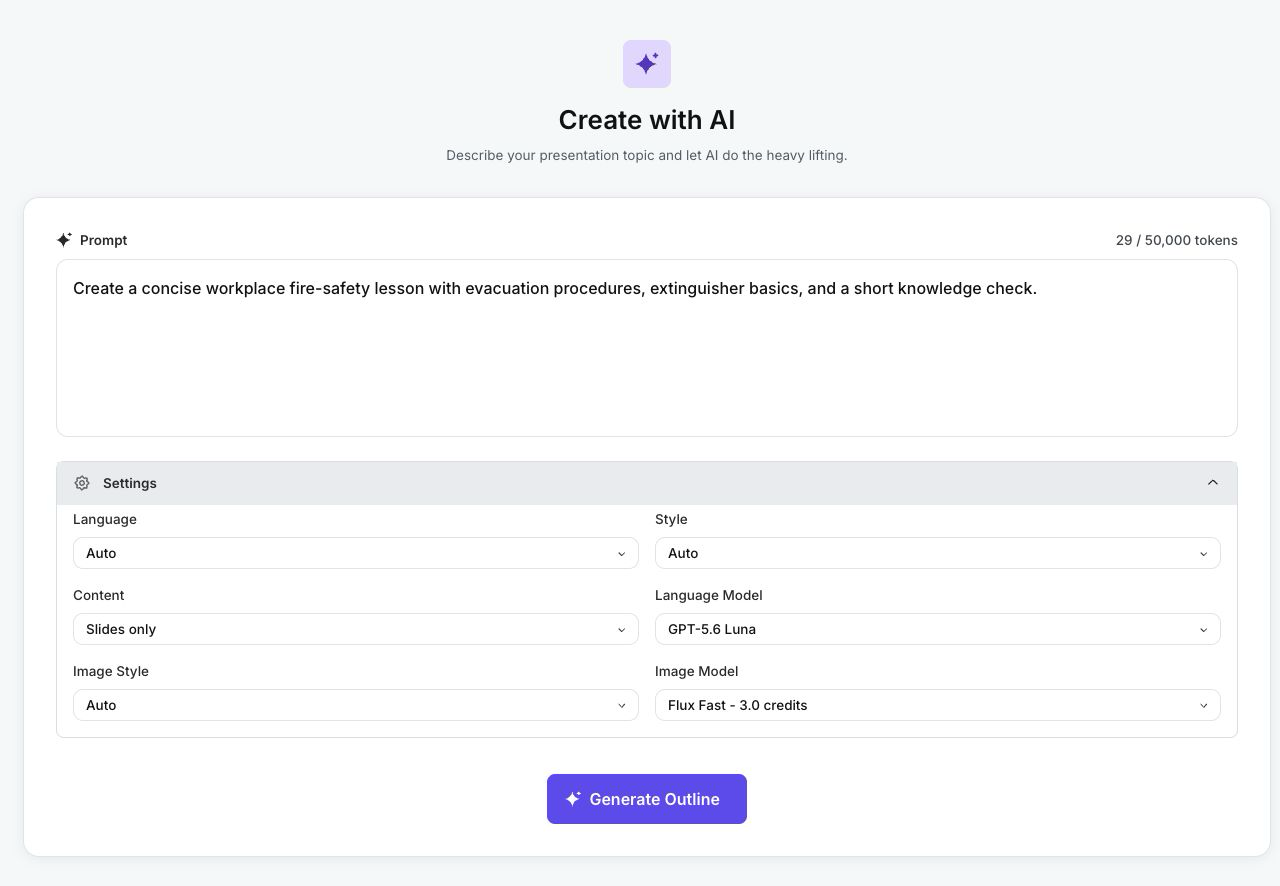
| Setting | What it controls |
|---|---|
| Language | The language AI should use for the generated content. Auto lets the service infer it. |
| Style | The writing voice, including Auto, Conversational, Educational, and Professional. |
| Content | Slides only, Quizzes only, or Slides & Quizzes. |
| Language Model | The model used for the outline and lesson text, marked $, $$, or $$$ for its relative cost. A lower-tier model can produce less complete or polished results. |
| Image Style | The visual direction for generated images. Choosing a style also makes its style prompt available for refinement. |
| Image Model | The model used to create images; the displayed credit cost can vary by model. |
Use Slides & Quizzes when the first draft should combine instruction and assessment. Use Quizzes only when you already have learning content and need a starting assessment, but always verify each answer and distractor.
3. Generate And Edit The Outline
Select Generate Outline. While AI is working, Cancel stops the current outline request.
When Presentation Outline appears, review it before any slides are created.
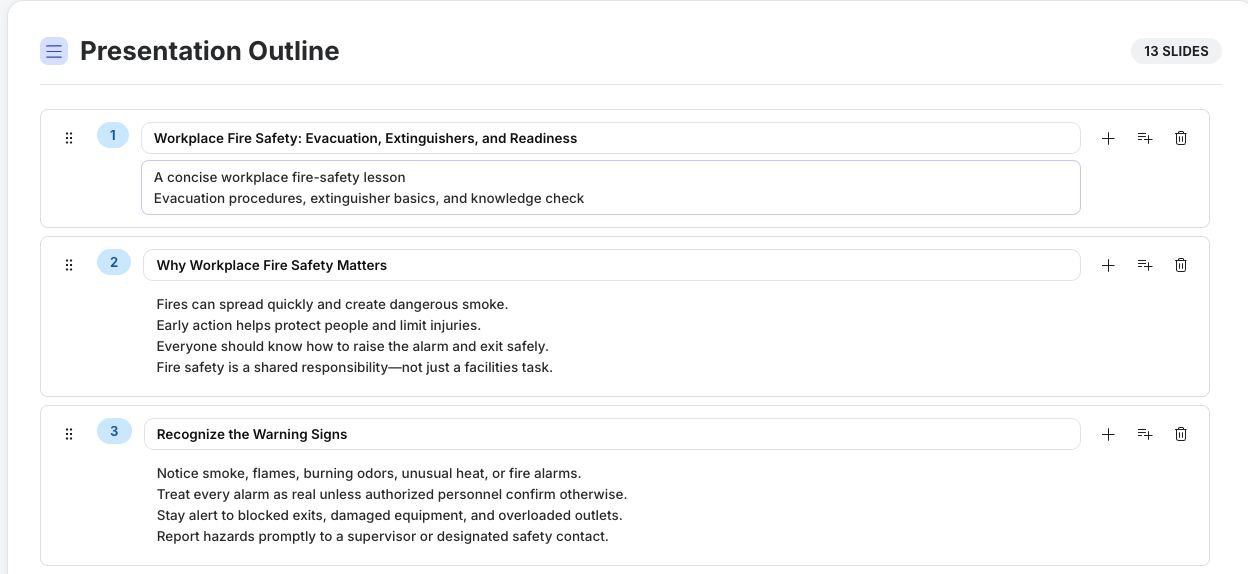
You can edit a slide title and its points, add or delete points, and drag items to reorder the structure. Check that:
- every section supports the stated learning outcome;
- facts and procedures match an authoritative source;
- quiz slides test something taught in the lesson;
- the order moves from prerequisite knowledge to practice and summary; and
- the scope is realistic for the intended lesson time.
Select Regenerate Outline only when you want AI to replace the outline from the current prompt and settings. Open Design & Layout to choose Slide Layout with a template or Fluid Layout with a theme, then select Generate Presentation.
Generation continues in the editor. Wait until the slides finish and the save status is current before making large edits.
4. Start From A Document
From My work, select Import Document. The tooltip shows the upload limit for the current plan.

Supported source files are .pdf, .docx, .pptx, .xlsx, and .txt. The current maximum is 5 MB on Free and 100 MB on Pro.
- Choose a supported file from your device.
- Wait for Document imported. The AI page shows the file name after text extraction succeeds.
- Add an instruction in Prompt when you want AI to focus, simplify, reorganize, or create a particular assessment from the source.
- Review Settings and Design & Layout.
- Select Generate Presentation.
The document workflow generates the outline and presentation together; it does not pause at the editable Presentation Outline step used by a prompt-only project. Review the resulting slides especially carefully.
Do not upload a file merely because it is available. Remove confidential or personal information that learners and the AI service do not need.
5. Review The Generated Presentation
Treat the editor result as a draft:
- Verify claims, dates, calculations, procedures, and citations against the source.
- Check each question, correct answer, distractor, score, feedback, and attempt behavior.
- Replace generic examples with ones appropriate to your learners.
- Confirm that generated images are accurate, inclusive, and relevant.
- Check reading order, contrast, alternative text, audio, and captions where applicable.
- Use Present to complete the lesson as a learner would.
Troubleshoot AI Creation
| What happens | What to check |
|---|---|
| Generate Outline is unavailable | Enter a prompt and make sure it does not exceed the token limit. |
| The outline is weak or too broad | Add the audience, learning outcome, required sections, desired length, and assessment instructions to the prompt. |
| A file is rejected | Use PDF, DOCX, PPTX, XLSX, or TXT and stay within the current plan's size limit. |
| No text can be extracted | Use a text-based source. A scanned or image-only document may need OCR before import. |
| Generation stops or fails | Check the connection and credits, then try again. Avoid repeatedly submitting while a request is still running. |
| The generated lesson is incomplete | Try a stronger language model, divide a very large source into focused lessons, or build the missing section manually. |
Quick Check
Before continuing, make sure that you can:
- write a prompt with audience, outcome, scope, and assessment guidance;
- choose the language, style, content, language model, and image options;
- edit and reorder a generated outline;
- explain how document import differs from prompt-only creation; and
- review AI-generated content before delivery.
Previous: Create A Blank Presentation · Next: Use AI Tools In The Editor · Back to Part III · Back to the full guide