
3.4: Start From A Template
A template is a reusable set of slide designs. It saves time when you want a coordinated visual structure but do not want AI to write the lesson content. The copy created in your workspace is yours to edit; changing it does not alter the source template.
1. Choose A Template During Blank Creation
Sign in, switch to Teacher View, and select Create Blank from My work. Keep Slide Layout selected, then choose a card under Template.
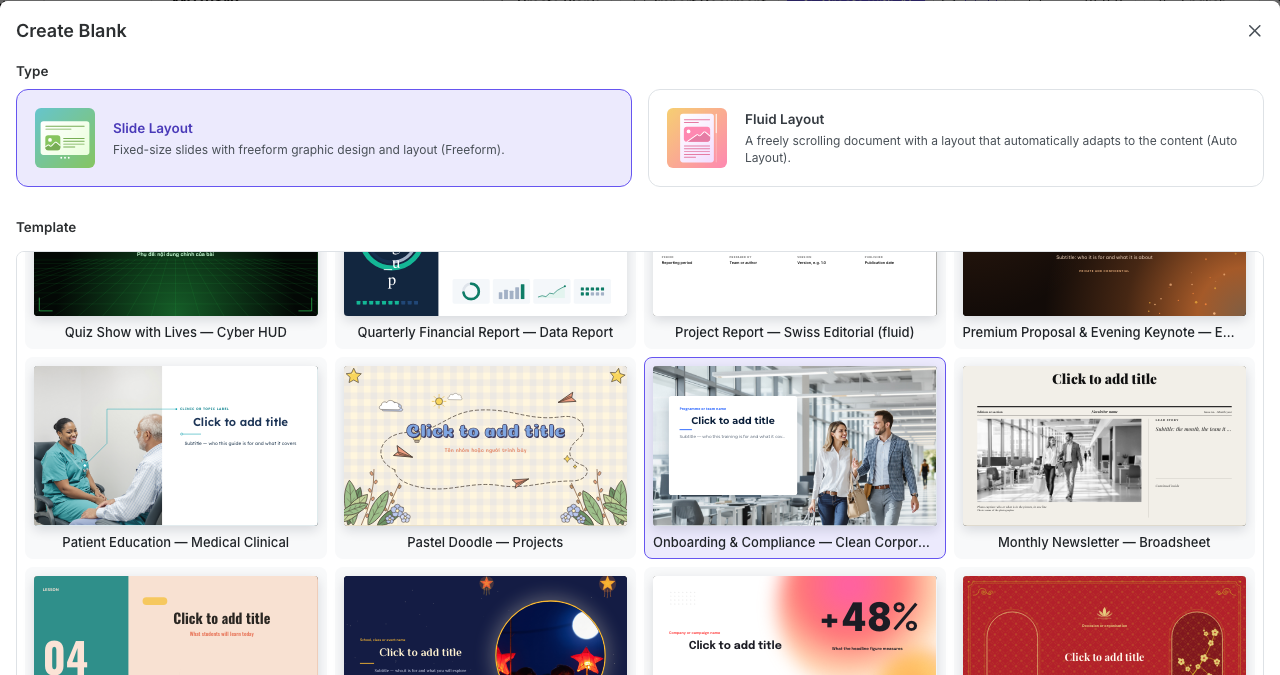
Select Create to open an Untitled Lesson based on that template. Rename it in the editor and replace the sample structure with your own learning objectives, content, questions, and delivery settings.
Fluid lessons use Theme cards instead of these slide templates. Return to the Type choices and select Fluid Layout when scrolling, auto-layout content is the real requirement.
2. Browse Templates In Your Workspace
Select Templates in the dashboard sidebar to open the gallery. Use Search templates to find a subject or style, choose Newest or Name to sort the cards, and select a category to narrow the results.
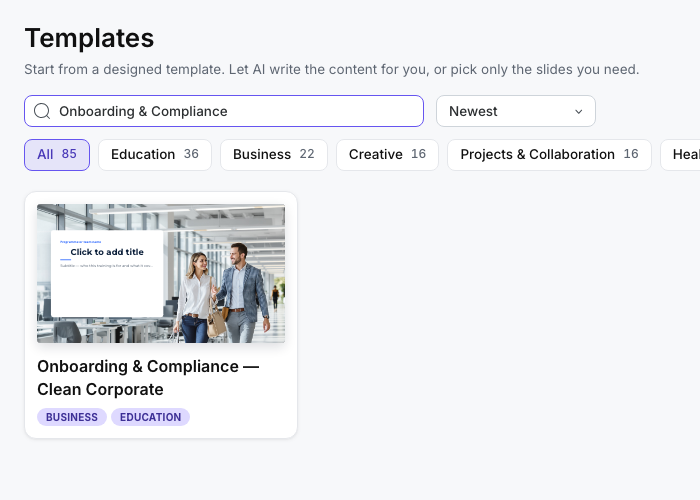
Select a card to preview its slides and read its description. For example, Onboarding & Compliance — Clean Corporate opens with a workplace image and a text card. Its layouts include policies, scenarios, knowledge checks, results, and a completion certificate.
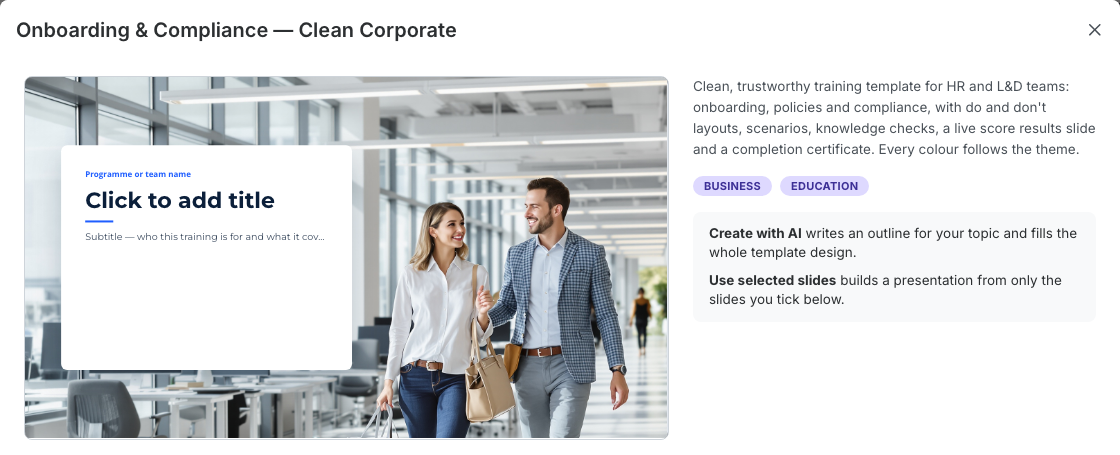
Create with AI uses the selected design while drafting content for your topic. To write the content yourself, select the slides you need, choose Use selected slides, and name the new lesson. The original template remains available for other projects.
3. Browse The Public Template Catalog
On the public uPresenter Home page, select Templates in the header. The catalog is titled Templates and describes the entries as ready-made designs you can open and make your own.
Each published card shows its name, preview image, and description. Select a card to open its detail page. The live preview lets you move through the slides with the arrow controls, and dots mark the current position. A What's inside section lists the slides, layout, editing, and delivery notes.
The current public catalog does not include category or tag filters. Browse the visible cards and open the strongest visual match rather than looking for controls that are not present.
If the page says No templates published yet., return to the dashboard and select Templates in the sidebar to browse the workspace gallery.
4. Use A Public Template
On the template detail page:
- Read the description and move through the preview.
- Select Use this template.
- If asked, sign in. uPresenter returns to template creation after it identifies your account.
- Wait while Creating your lesson… appears.
- When the editor opens, rename Untitled Lesson and confirm that the correct account and workspace own it.
One visit creates one lesson. The creation page replaces itself with the editor, so the browser's Back button should return to the template page rather than create another copy. If anything unexpected happens, open the dashboard and check My work before trying again.
5. Adapt The Template For Learning
A polished design is only the starting structure. Before delivery:
- replace every placeholder and generic example;
- remove slides that do not support the learning outcome;
- add questions, feedback, completion criteria, and success criteria where needed;
- check contrast, type size, reading order, alternative text, and media accessibility;
- apply approved branding and confirm that you may reuse any included media; and
- use Present to test the complete learner experience.
Quick Check
Before you finish, make sure that you can:
- choose a template during Create Blank;
- find a design in the workspace Templates gallery and select the slides you need;
- open the public Templates catalog and preview a published design;
- explain what Use this template creates; and
- turn a visual starting point into a complete learning experience.
Previous: Use AI Tools In The Editor · Next: Use Inspiration And Remix Public Content · Back to Part III · Back to the full guide