
11.1: Apply And Customize Themes
A theme keeps colors, type, slide surfaces, and AI-generated imagery visually related across a presentation. Setting that system first makes later slide work faster and helps learners recognize headings, body text, buttons, and repeated content patterns.
In this section, you will apply a standard theme, create a custom theme, use AI as a visual starting point, and manage reusable themes.
Before You Begin
Open a presentation in the editor and select Design in the top bar. The Design pane contains two different sections:
- Layout controls the presentation's page model, positioning, size or maximum width, and page background.
- Theme controls the reusable visual system applied to the presentation.
1. Apply A Theme
The theme gallery is divided into Custom, Standard, and Archived views. In a narrow pane, these names can appear as icons; pause over an icon to see its label.
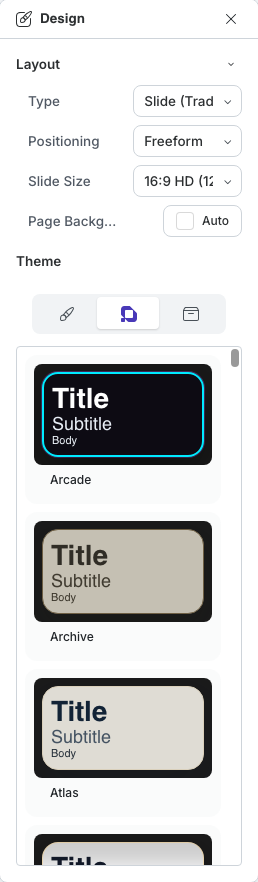
- Open Standard to browse built-in themes or Custom to use a theme available to your workspace.
- Scroll through the previews. Each card demonstrates its title, subtitle, body, background, and accent treatment.
- Select a theme card. The editor applies it to the presentation and marks the active card as Current.
- Inspect several slides, not only the selected one. Theme-aware colors and text styles update across the presentation, while intentional local formatting can still need review.
Applying a theme also returns the presentation-level Page Background to Auto, allowing the new theme's page background to appear. Check the space around the slide as well as the slide itself.
2. Create A Custom Theme
Open Custom, then select New Theme. A new custom theme begins with the current theme as its starting point, so you can change only what the presentation needs.
Set The Color System
Use Colors to define Primary, seven accent colors, the title, subtitle, and body text colors, and the slide and page backgrounds. Page Blur softens a page background behind the slide surface.
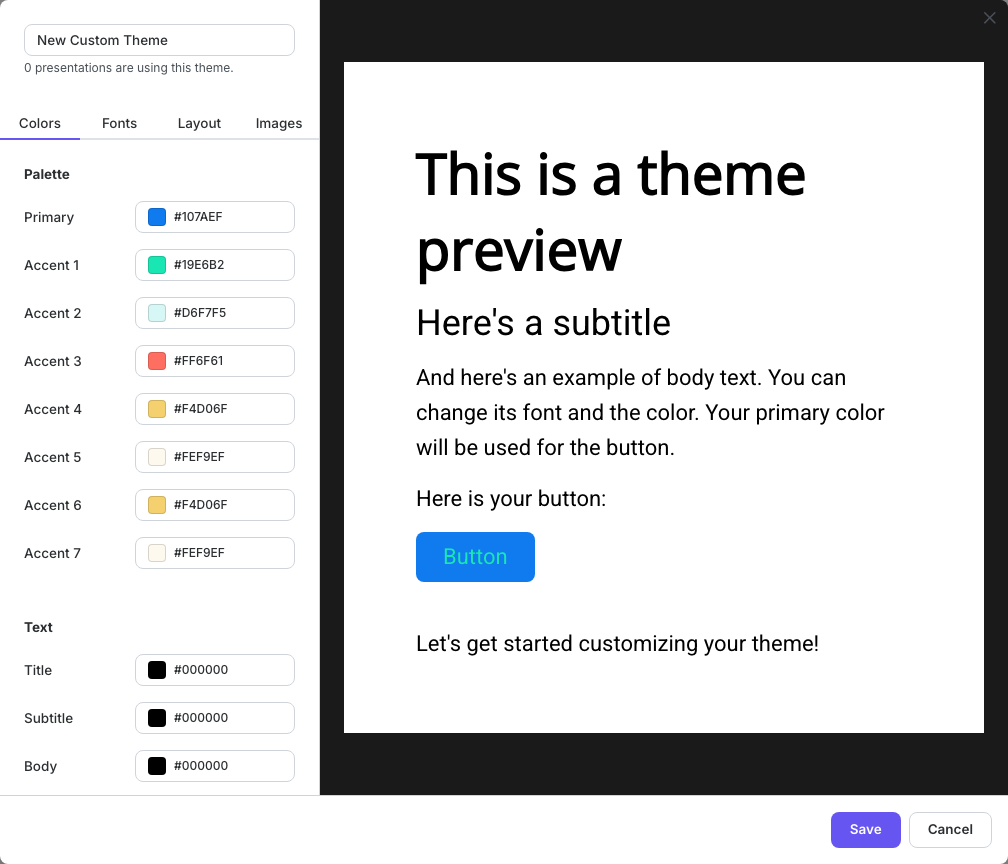
The preview responds while you edit. Check contrast in the sample title, subtitle, paragraph, and button before saving. A color palette is useful only when text and controls remain readable.
Set Theme Typography
Open Fonts and configure Title, Subtitle, and Body independently.
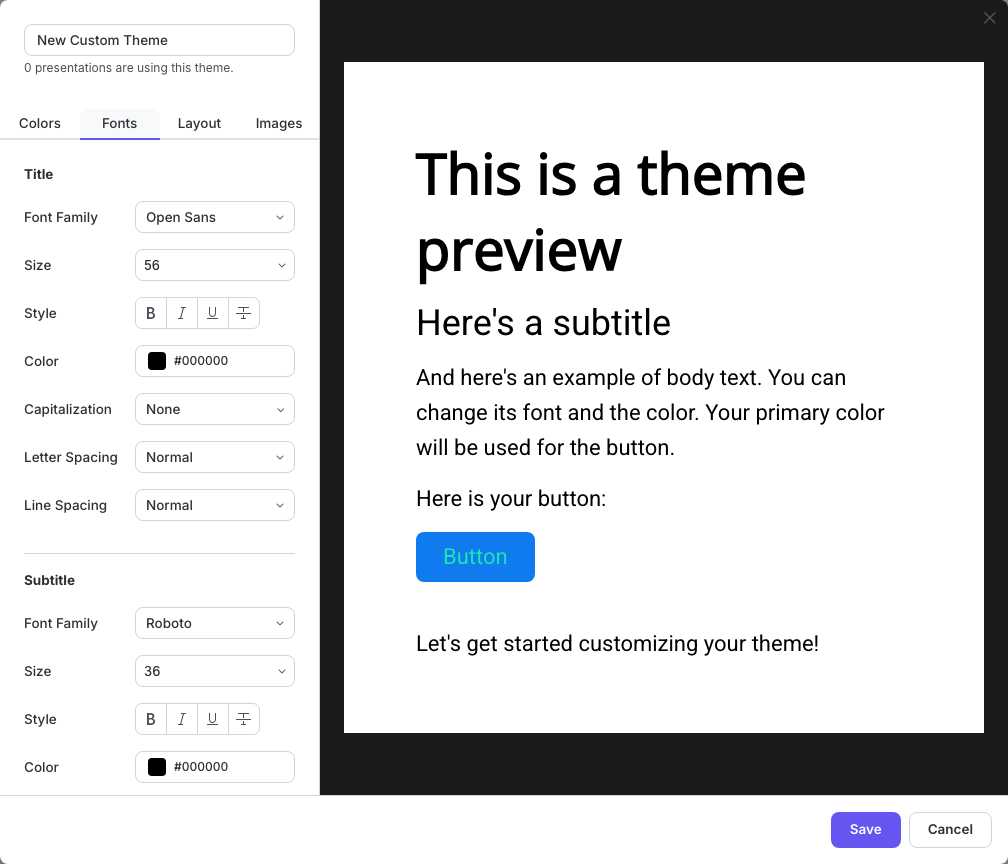
For each level, you can choose the font family and size, apply bold, italic, underline, or strikethrough, set a color, and adjust letter and line spacing; Title and Subtitle also offer a capitalization style, which Body does not. Keep the three roles visibly distinct without using more variation than the lesson needs.
Style The Slide Surface
Open Layout inside the theme editor. This tab styles the slide surface; it does not change the presentation between fixed and fluid layout.
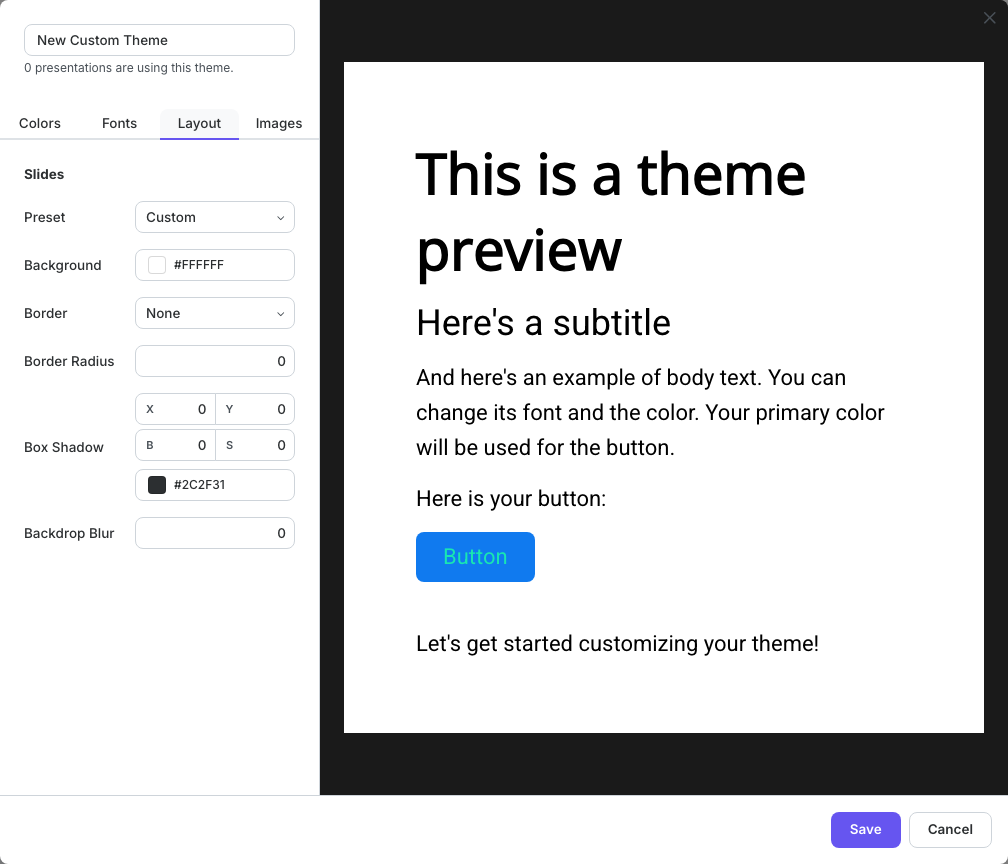
- Preset offers Solid, Glassmorphism, and Custom.
- Background sets the theme's slide fill.
- Border, Border Width, and Border Color define the edge when a border is enabled.
- Border Radius, Box Shadow, and Backdrop Blur control the surface treatment.
Open Images to add a Style Prompt. uPresenter appends this direction to later image-generation prompts so AI images made with the theme share a visual language.
Enter a recognizable theme name, select Save, and confirm that the saved theme becomes current in the presentation.
3. Generate A Theme With AI
In the Custom view, select Generate theme with AI.
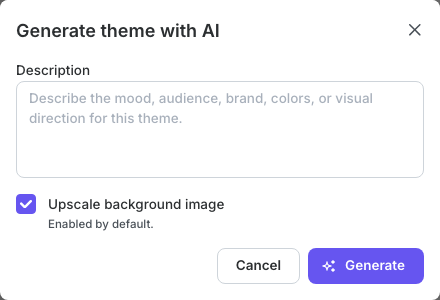
- In Description, state the audience, mood, brand direction, preferred colors, and visual style. For example:
Calm workplace safety training, high contrast, navy and amber, clean editorial illustrations. - Leave Upscale background image selected when the generated background should also be enlarged for presentation use. Clear it when a generated and upscaled background is unnecessary.
- Select Generate. AI theme generation consumes credits.
- Review the generated theme on several slides. Edit its colors, fonts, surface, or image prompt when needed.
Treat the generated result as a starting point. Confirm accessibility, brand accuracy, and subject suitability before delivering the lesson.
4. Manage Reusable Themes
Open the More menu on a theme card to see the actions available for that theme.
- A standard or read-only shared theme uses Copy and customize so the original remains unchanged.
- A custom theme can be Edited or Duplicated.
- Presentation owners can Archive custom themes that should leave the active gallery. Open Archived and choose Restore to bring one back.
- Delete is available only for a custom theme that is not used by a presentation. Deletion cannot be undone.
The usage message in the theme editor tells you how many presentations currently use the theme. When a theme is shared across several presentations, edit it deliberately because the visual changes can affect all of them.
5. Override A Single Slide Deliberately
Use a local background only when one slide needs to differ from the theme—for example, a section divider or photographic opening slide.
- Select the slide and use Background Color in the slide toolbar to set a slide-specific fill.
- To use an image, insert or generate the image, select it, open More, and choose Set as background. The image becomes the selected slide's background and the original image object is removed from the object stack.
- Check text contrast and object visibility on that slide.
- Use Present to confirm the crop and reading order at learner size.
Local overrides can make later theme changes less obvious. If many slides need the same treatment, put it in the theme instead.
Quick Check
Before continuing, make sure that you can:
- distinguish Layout settings from the Theme gallery;
- apply and identify the current theme;
- edit theme colors, fonts, slide-surface design, and image-generation style;
- generate and review an AI theme;
- copy, duplicate, archive, restore, and delete themes under the correct conditions; and
- use a slide-specific background only when it serves the lesson.
Previous: Set Action Conditions · Next: Configure Presentation Settings · Back to Part XI · Back to the full guide